# Quick Start
TIP
AIHelp offers both API and URL options for integration, you can choose your preferred method according to your own needs.
# API
To integrate AIHelp by API, you need to import AIHelp at first, then call initialize API to initialize, and show API to open up AIHelp window.
- Import AIHelp in your project:
<script src="https://cdn.aihelp.net/webchatv5/aihelp.js"></script>
- Specify the
widthandheightcss attributes for AIHelp window:
<head>
  <style>
    .AIHelpSupportBox {
      width: 100vw;
      height: 100vh;
    }
  </style>
</head>
- Define a self-executing function, and start the initialization for AIHelp by calling the
initializeAPI:
<script src="https://cdn.aihelp.net/webchatv5/aihelp.js"></script>

<body>
  <script>
    (function () {
      let initConfig = {
        domain: "THIS IS YOUR APP DOMAIN",
        appId: "THIS IS YOUR APP ID",
        language: "THIS IS YOUR DEFAULT LANGUAGE(OPTIONAL)"
      };
      AIHelpSupport.initialize(initConfig);
      AIHelpSupport.registerAsyncEventListener("initialization", function (jsonData) {
        // When init job is done, you can get callback here
        // `jsonData`: { "isSuccess": true, "message": "Success" }
      });
    })();
  </script>
</body>
- Call the
showAPI to open up the AIHelp window:
if (typeof AIHelpSupport !== undefined) {
  AIHelpSupport.show("THIS IS YOUR ENTRANCE ID");
}
# URL
If the API cannot meet your requirements in some cases, you can also choose to open the AIHelp window by appending a URL:
<script>
  let domain = "THIS IS YOUR APP DOMAIN";
  let appId = "THIS IS YOUR APP ID";
  let language = "THIS IS YOUR DEFAULT LANGUAGE(OPTIONAL)";
  let entranceId = "THIS IS YOUR ENTRANCE ID";
  (function () {
    let url = `https://${domain}/webchatv5/#/${appId}?language=${language}&entranceId=${entranceId}`;
    window.open(url);
  })();
</script>
# Definition
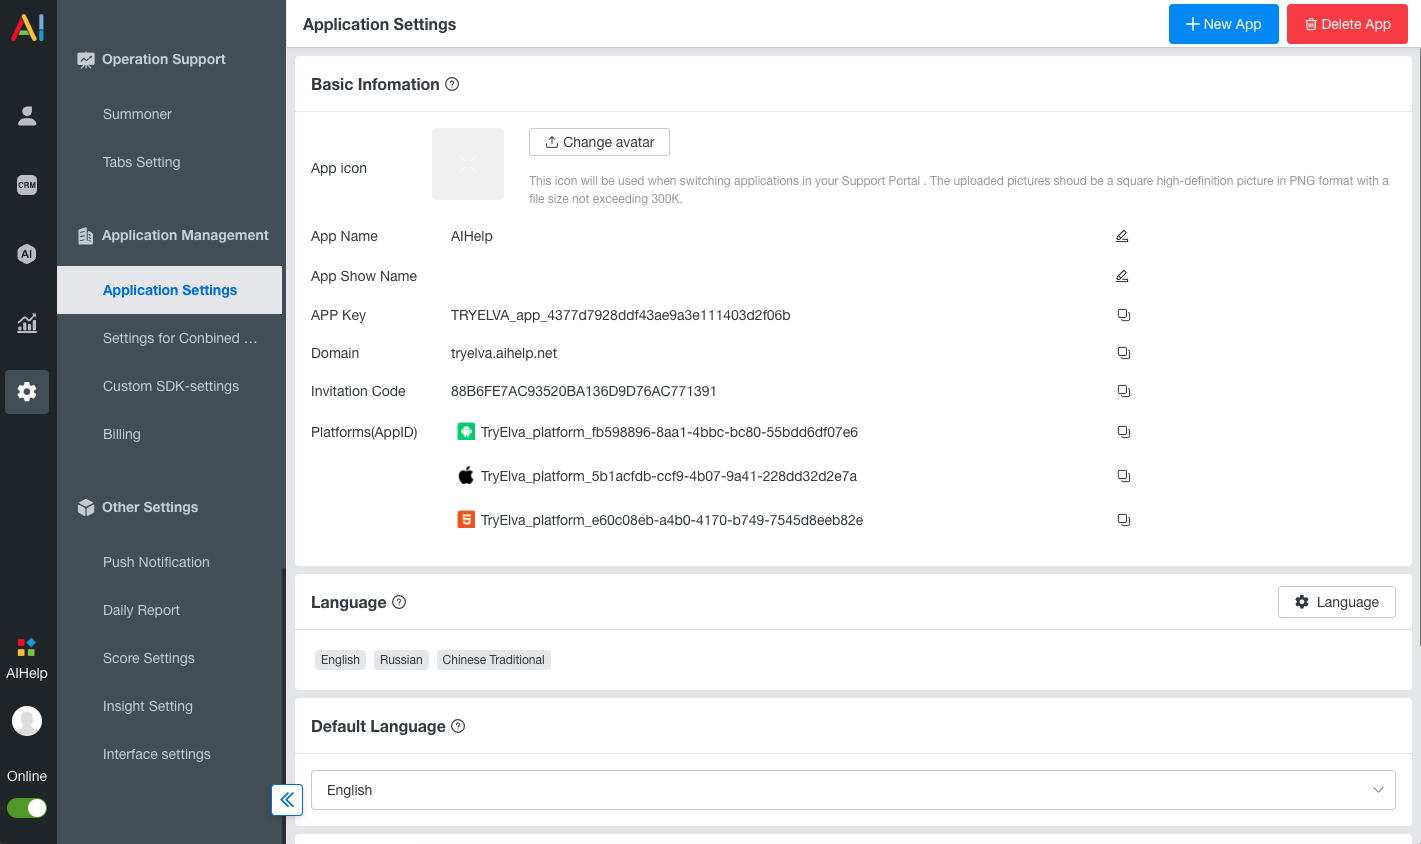
# domain / appId
- Type:
string - Detail: Required. You can get these parameters at here:
# entranceId
- Type:
string - Detail: Required. Entrance ID configured in AIHelp dashboard, take a look at here for more information.
# language
- Type:
string - Default:
browser language - Detail: Optional. This is AIHelp's default initialize language; If you are not setting this, we will use browser's language to initialize AIHelp.
- See also: Check here to learn language code you may need. Going International?
# Style
You can cascade AIHelp's original style by CSS.
In order to do this, you'll need the following selectors:
- The root element:
.AIHelpSupportBox - The close button in the upper right corner:
.AIHelpSupportClose
Assuming you need to add a Contact-Us button in the bottom right corner, the css code example is as follows:
Custom AIHelp Stylesheet
.AIHelpSupportBox {
  width: 375px;
  height: 500px;
  position: fixed;
  right: 1rem;
  bottom: 4rem;
}

.AIHelpSupportClose {
  position: absolute;
  right: 10px;
  top: 10px;
  width: 30px;
  height: 30px;
  color: #fff;
  background: #f9c633;
  border-radius: 25px;
  cursor: pointer;
}

.AIHelpSupportClose:before {
  position: absolute;
  content: "";
  width: 20px;
  height: 2px;
  background: #fff;
  transform: rotate(45deg);
  top: 14px;
  left: 6px;
}

.AIHelpSupportClose:after {
  content: "";
  position: absolute;
  width: 20px;
  height: 2px;
  background: #fff;
  transform: rotate(-45deg);
  top: 14px;
  left: 6px;
}
Afterwards, you would get an AIHelp window just like this:
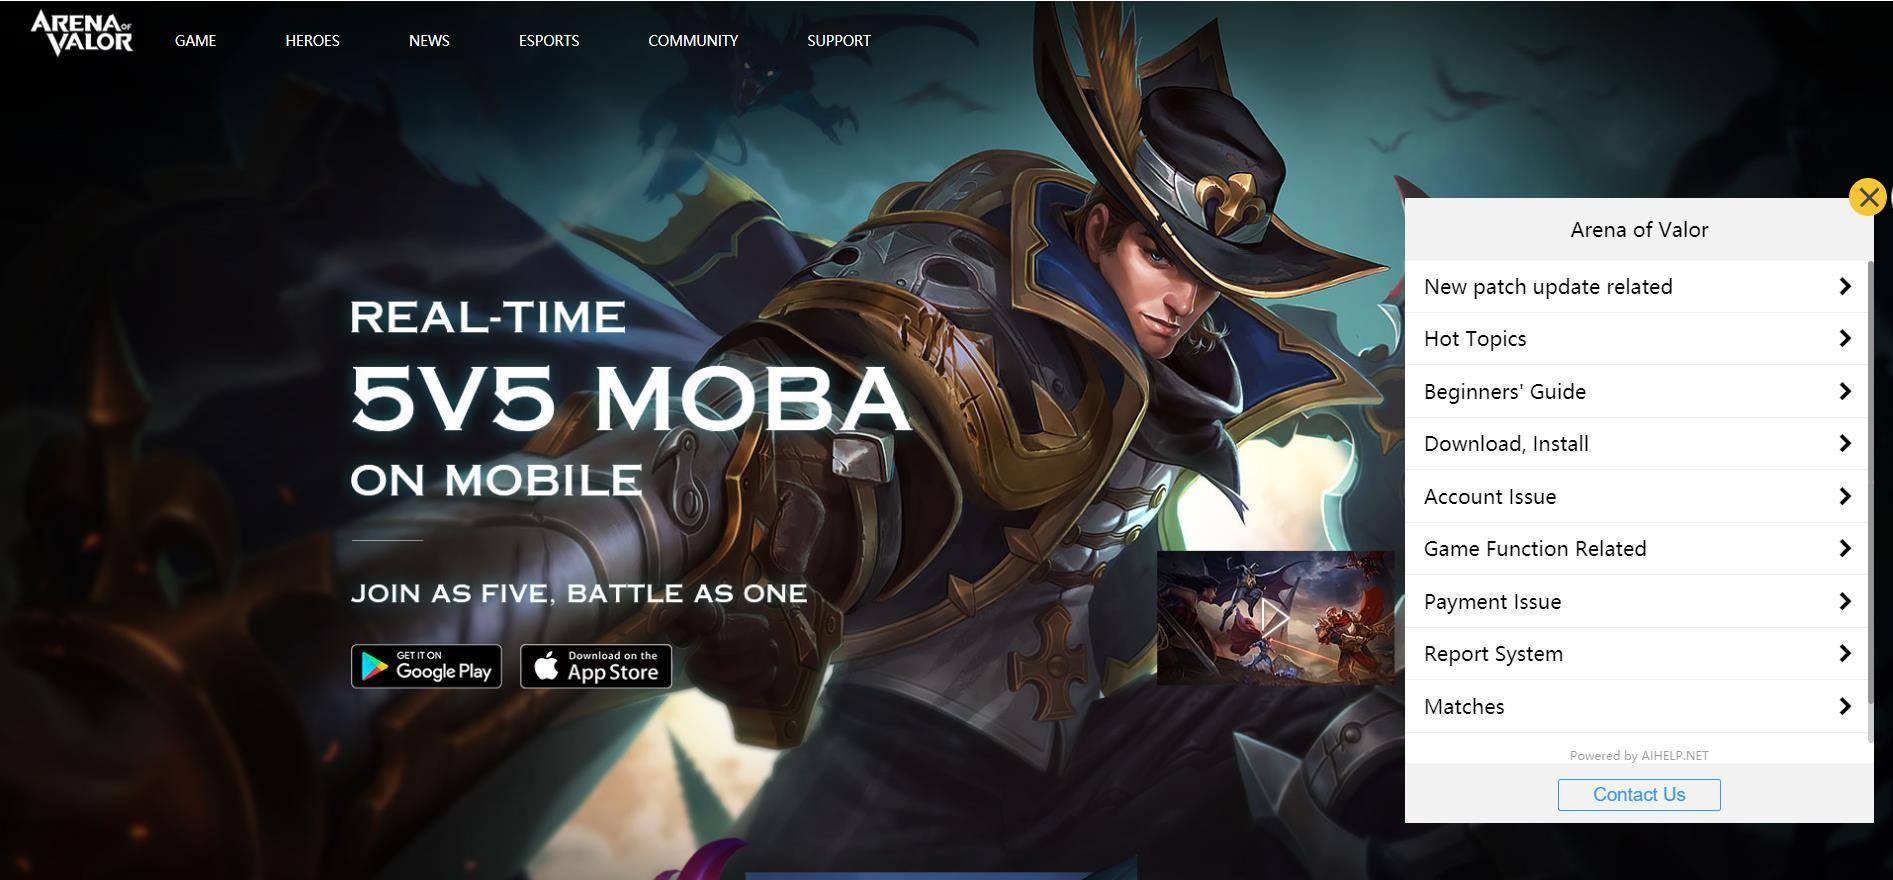
Events →